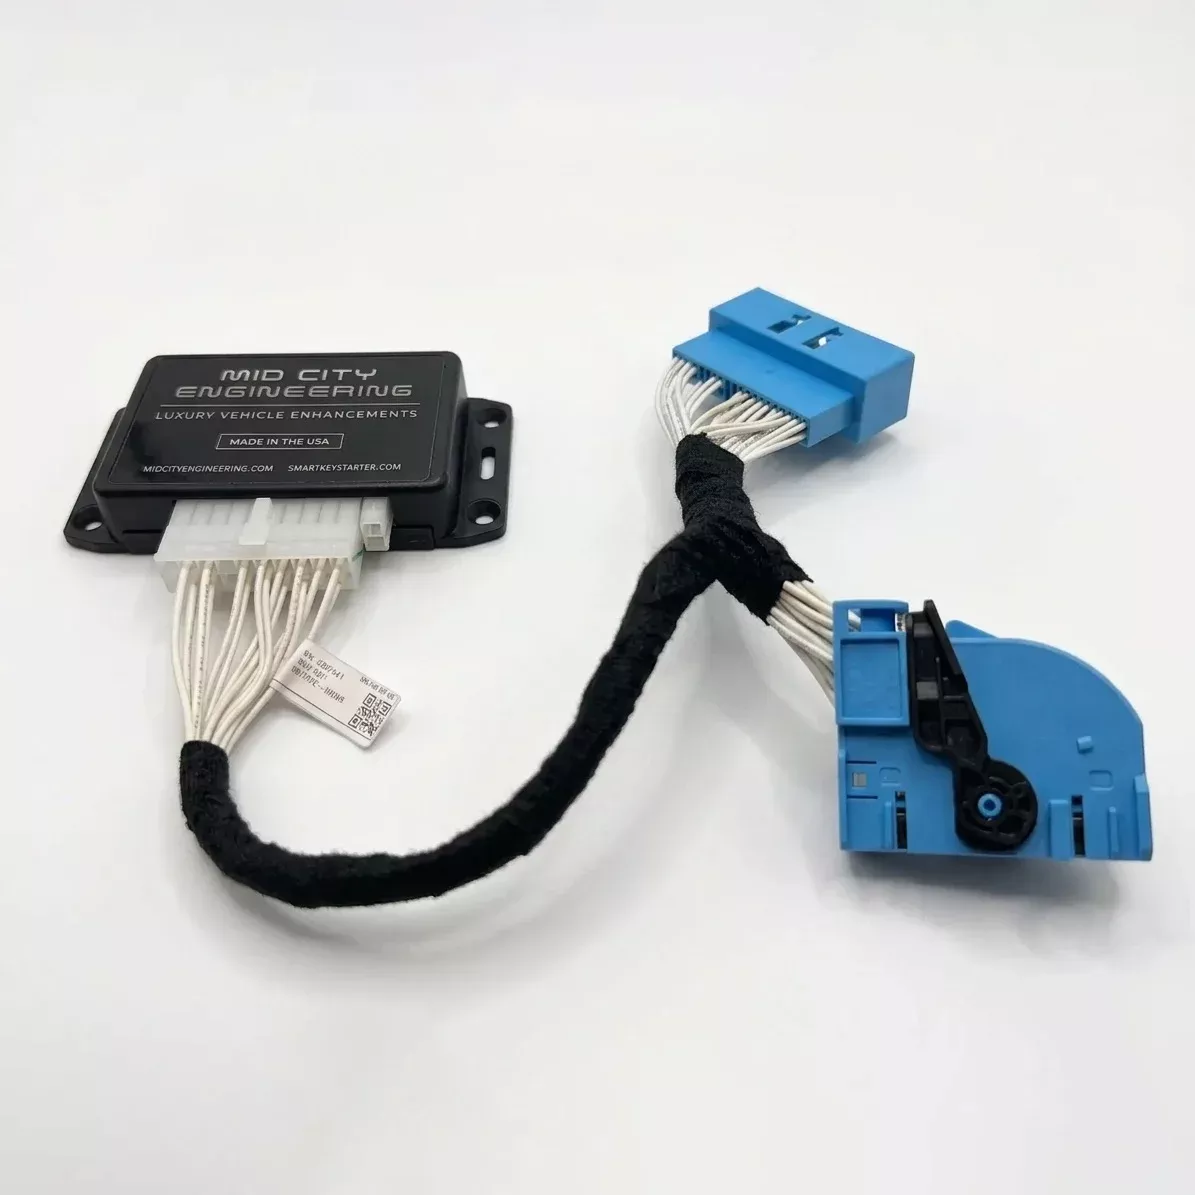
The Mid City Radio On Automatic Shutdown Bypass for 2025+ Mercedes Sprinter Vans (907GRADON) from Nomadic Supply Company® eliminates the factory radio shutdown that occurs when your Sprinter’s engine automatically turns off, allowing you to maintain continuous power to your infotainment system during extended stops. This professional-grade bypass module integrates seamlessly with your 2025+ Sprinter’s electrical system to override the automatic shutdown feature that would otherwise cut power to your radio and connected devices.
Built specifically for the latest generation Sprinter vans, the Mid City Radio On Automatic Shutdown Bypass for 2025+ Mercedes Sprinter Vans (907GRADON) provides a clean, factory-integrated solution that maintains your vehicle’s warranty while delivering reliable performance. The bypass module works silently in the background, automatically detecting when the engine shuts down and maintaining power flow to your radio system without any driver intervention required.
Whether you’re running a mobile business, camping off-grid, or simply want uninterrupted access to your entertainment and communication systems, the Mid City Radio On Automatic Shutdown Bypass for 2025+ Mercedes Sprinter Vans (907GRADON) from Nomadic Supply Company ensures your radio stays powered when you need it most. The module’s intelligent design prevents unnecessary battery drain while giving you complete control over when your radio system remains active during engine shutdown periods.
Mid City Radio On Automatic Shutdown Bypass for 2025+ Mercedes Sprinter Vans (907GRADON) Features:
- Continuous Infotainment Power: Eliminates the automatic factory radio shutdown, allowing the MBUX system to remain fully operational while the engine is off.
- MBUX Connectivity Maintenance: Keeps the OEM Wi-Fi hotspot and all connected internet features active, which is essential for remote work and off-grid living.
- Intelligent Battery Management: Engineered to prevent unnecessary battery drain while providing the user with complete control over the radio’s power cycles.
- Simplified Control: Features an easy On/Off switch operation—simply press the MBUX power button to activate the system, and it stays on until manually turned off.
- Silent Background Operation: Automatically detects engine shutdown and overrides the power-cut signal without requiring any driver intervention.
- Professional & Warranty-Safe: Delivers a clean, factory-integrated solution that maintains the vehicle’s electrical integrity and manufacturer warranty.
Mid City Radio On Automatic Shutdown Bypass for 2025+ Mercedes Sprinter Vans (907GRADON) Specifications:
- Vehicle Compatibility:
- 2025+ Mercedes-Benz Sprinter W907 / VS30
- 2025+ Freightliner Sprinter W907
- Installation Type: 100% Plug & Play; non-invasive integration with the vehicle’s electrical system.
- Control Logic: Manual override via the factory MBUX power button (Infinite-on until manually toggled).
- System Support: Compatible with all MBUX features, including radio, navigation, and Wi-Fi hotspot.
- Application: Ideal for mobile businesses, commercial work trucks, and camper van conversions requiring stationary power for entertainment and communication.
Mid City Radio On Automatic Shutdown Bypass for 2025+ Mercedes Sprinter Vans (907GRADON) Installation Guide:
Here are the easy-to-follow instructions for the Mid City Engineering 907GRADON system. This programmer allows the factory radio to be turned on and used without the ignition being in the “on” position, which is ideal for camping or extended stays in the vehicle.
Phase 1: Dash & Floor Disassembly
- Remove Knee Bolster Panel: Use a plastic pry tool to remove the small panel at the end of the driver-side knee bolster.
- Remove Footwell Screws: Locate and remove the two screws at the end of the footwell, then remove that panel.
- Access Fuse Box:
- Turn the plastic screws in the footwell counter-clockwise.
- Remove the access panel and pull back the floor liner to reveal the fuse access panel.
- Remove Sill Panel:
- Remove the single screw holding the sill panel in place (located under the floor liner).
- Pop out the two plastic panel tabs.
- Pull back the floor and set the sill panel aside.
Phase 2: CAN Bus Integration
- Locate CAN Block: Find the CAN distribution block below the A-pillar (identifiable by purple and purple/white wires).
- Identify Radio CAN Plug:
- Start the engine and turn the radio on.
- Using a pick tool, unplug the 2-pin connectors from the block one by one.
- Wait 10 seconds after each unplug. When the radio shuts off, you have found the correct OEM plug.
- Connect T-Harness:
- Plug the white 2-pin plug from the provided T-harness into any empty spot on the distribution block.
- Connect the OEM CAN plug (identified in the previous step) into the male connector of the T-harness.
- Note: Ensure the solid purple wire on the T-harness aligns with the solid purple wire on the OEM plug.
Phase 3: Wiring & Power
- Connect Ground: Locate the factory bolt near the door opening. Remove it, place the black wire’s ring terminal onto the post, and tighten the bolt back down.
- Connect Power:
- Find the red power lead on the 907GRADON harness.
- Route the empty fuse holder terminal through the bottom of the fuse box (under the passenger floor).
- Insert it into the designated fuse location (refer to your kit’s specific diagram).
- Insert the provided fuse into the top of the holder.
Phase 4: Testing & Operation
- To Activate: With the ignition OFF, press the Volume/Power button on the radio. The system will bypass the factory shutdown timer.
- To Deactivate: Simply turn the radio off using the power button or wait for the user-programmed timeout period to expire.
- Note: If the vehicle is being serviced or receiving a software flash, unplug the OEM CAN plug from the 907GRADON harness and plug it directly back into the factory CAN block.
Important Safety Warnings
- Battery Management: Using the radio for extended periods while the engine is off will consume chassis battery power. Ensure your battery is in good health or connected to a charger if using this feature for several hours.
- Secure Connections: Use electrical tape to secure the connection between the factory plug and the T-harness to prevent it from vibrating loose over time.