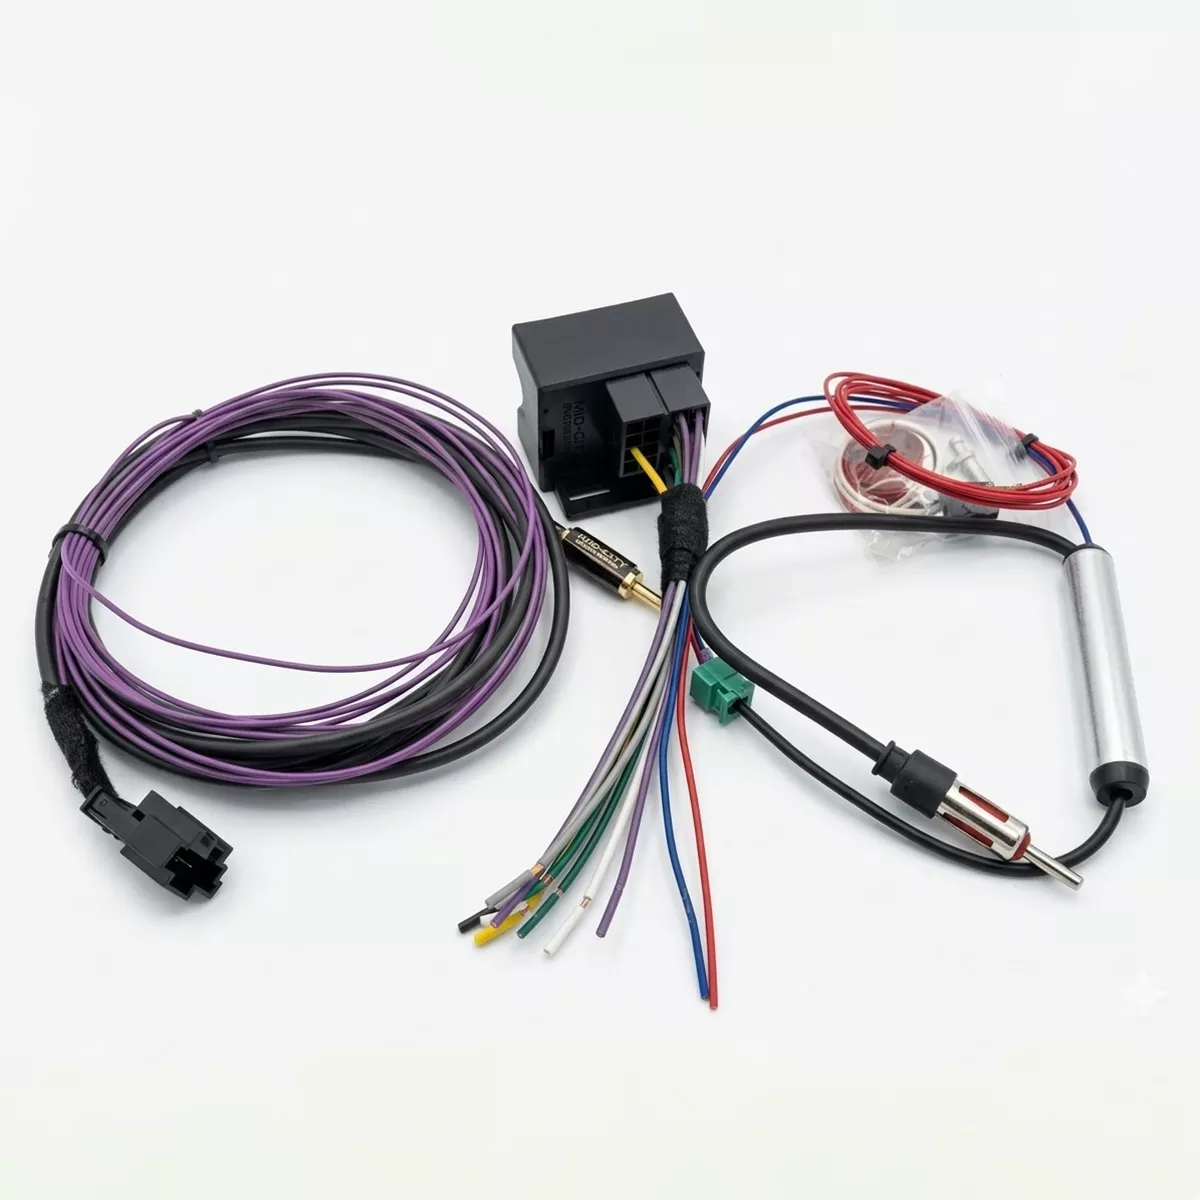
The Mid City Radio Replacement Kit for 2019+ Mercedes Sprinter Vans from Nomadic Supply Company® delivers professional-grade audio integration designed specifically for Mercedes Sprinter vans. This comprehensive replacement system transforms your vehicle’s entertainment capabilities with precision-engineered components that ensure seamless installation and reliable performance.
Built to meet the demanding requirements of commercial and recreational Sprinter applications, the Mid City Engineering Radio Replacement Kit for Sprinter provides exceptional audio quality and modern connectivity features. The system’s robust construction and thoughtful design make it an ideal solution for van life enthusiasts, fleet operators, and anyone seeking to upgrade their Sprinter’s factory radio system.
Whether you’re embarking on cross-country adventures or managing daily operations, the Mid City Engineering Radio Replacement Kit for Sprinter from Nomadic Supply Company delivers the reliability and performance you need. This professionally engineered solution combines cutting-edge technology with practical functionality, ensuring your Sprinter’s audio system meets today’s connectivity demands while maintaining the vehicle’s original aesthetic and operational integrity.
The Mid City Plug & Play Aftermarket Radio Harness Kit for 2019-2024 Mercedes Sprinter Vans is intended to be used for Sprinters with an existing OEM radio. For Sprinters without an OEM (non-MBUX radio), you will need to order our Mid City Plug & Play Aftermarket Radio Upgrade Kit for 2019-2024 Mercedes Sprinter.
Mid City Radio Replacement Kit for 2019+ Mercedes Sprinter Vans (907RADREP) Features:
- True Plug-and-Play Integration: Use OEM connectors for a factory-quality fit. This system requires zero cutting or soldering of your original vehicle wires, ensuring a clean installation that can be reversed if necessary.
- Retain Essential Safety Features: The kit is designed to maintain the SOS system (audio only), ensuring you stay connected in emergencies while preventing annoying “error” messages on your dashboard.
- Enhanced Visibility: Includes the necessary components to move your OEM reverse camera feed from the small rearview mirror display directly onto your new, larger aftermarket radio screen.
- Smart Power Management: Interfaces with the Retained Accessory Power (RAP) circuit, allowing your radio to stay powered after the ignition is turned off until the vehicle door is opened.
- Comprehensive Connectivity: The full kit integrates the factory radio harness, provides an amplified solution for the OEM antenna, bypasses the SOS mic for clear communication, and supplies ignition power directly from the fuse box.
Mid City Radio Replacement Kit for 2019+ Mercedes Sprinter Vans (907RADREP) Specifications:
- Vehicle Compatibility: 2019+ Mercedes & Freightliner Sprinter (907 Chassis)
- Radio Requirement: Designed for models with non-MBUX (base) radios
- Installation: 100% Plug-and-Play with OEM-style connectors
- Antenna Support: Integrated OEM antenna adapter with signal amplification
- Power Source: Dedicated ignition power integration from the fuse box
- Dash Integrity: Retains factory aesthetics; no dashboard errors or warnings
Mid City Radio Replacement Kit for 2019+ Mercedes Sprinter Vans Installation Guide:
Here are the easy-to-follow installation instructions for the Mid City Engineering 907RADREP Radio Replacement kit.
Note: This kit is designed specifically for 2019+ Sprinters with the single-DIN (non-MBUX) factory radio.
Phase 1: Factory Radio Removal
- Remove OEM Radio: Carefully remove the factory single-DIN radio from the dashboard.
- Disconnect Harnesses:
- Unplug the large main radio plug from the rear of the unit.
- Disconnect the blue antenna plug from the factory radio.
Phase 2: Wiring Connections
- Ground & Constant Power:
- Connect the black wire from the provided harness to the aftermarket radio’s ground wire.
- Connect the yellow wire from the provided harness to the aftermarket radio’s constant (battery) power wire.
- Connect your speaker wires to the aftermarket radio or amplifier as needed.
- Ignition Power Lead:
- Route the provided red wire (with the fuse holder terminal) from the radio cavity down to the fuse box under the passenger side floor.
- Pin the fuse terminal into the designated slot in the fuse box and insert the fuse from the top.
- Final Harness Splicing:
- Connect the other end of the red lead (from the fuse box) to the aftermarket radio’s ignition wire.
- Connect the blue wire from the antenna adapter harness to this same junction.
- Result: You should have three wires soldered together: the Red lead from the fuse box, the Aftermarket Radio ignition wire, and the Blue antenna adapter wire.
Phase 3: Specialty Adapters (SOS & Camera)
- SOS Light Bypass:
- Disconnect the 8-pin black plug and the 8-pin white plug from the OEM radio harness.
- Using the provided 8-pin adapter, connect these two plugs together. Ensure wire colors match across the plugs and the bypass harness.
- Camera Integration: Connect the OEM camera adapter harness. This moves the reverse video feed from the rearview mirror to your new aftermarket screen and provides the reverse trigger signal.
Phase 4: Final Assembly & Testing
- Main Connections:
- Plug the prepared radio replacement harness into the aftermarket radio.
- Connect the radio replacement harness to the OEM chassis harness removed in Phase 1.
- Antenna Connection:
- Connect the factory blue antenna plug to the adapter on the Mid City harness.
- Plug the standard antenna connector into the aftermarket radio.
- Test & Mount: Power on the vehicle to test all radio functions, camera triggers, and audio. Once confirmed, securely mount the new radio into the dash.
Important Note
- Installation Quality: For reliability in a mobile environment, it is highly recommended to solder and insulate all wire-to-wire connections rather than using crimp caps.