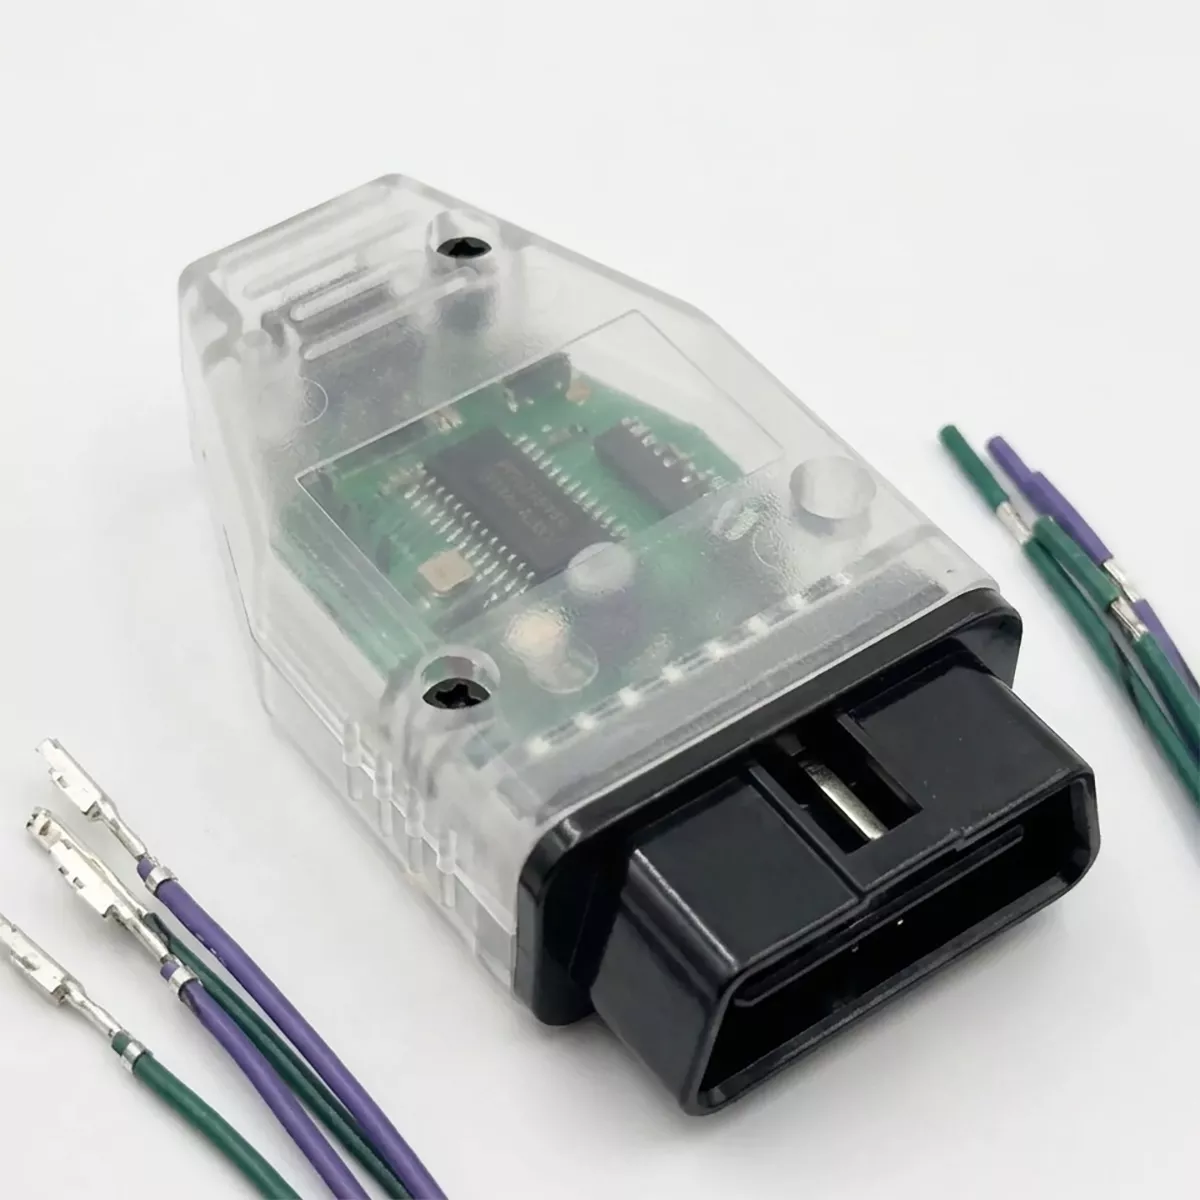
The Mid City W907 Rear Speaker OBD Programmer & Lead Set for 2019-2024 Mercedes Sprinter Vans (907REARSPKR) from Nomadic Supply Company® delivers professional-grade OBD programming capability specifically engineered for Mercedes-Benz W907 Sprinter rear speaker integration. This comprehensive programming solution streamlines the installation process with an intuitive turn signal stalk interface and a clear visual confirmation system.
The Mid City W907 Rear Speaker OBD Programmer & Lead Set for 2019-2024 Mercedes Sprinter Vans (907REARSPKR) eliminates complex coding procedures through its straightforward plug-and-program design. Built for Mercedes-Benz W907 Sprinter applications, the Mid City W907 Rear Speaker OBD Programmer & Lead Set for 2019-2024 Mercedes Sprinter Vans (907REARSPKR) ensures seamless rear speaker functionality integration.
Professional installers and van enthusiasts rely on the Mid City W907 Rear Speaker OBD Programmer & Lead Set for 2019-2024 Mercedes Sprinter Vans (907REARSPKR) for reliable programming results. The Mid City W907 Rear Speaker OBD Programmer & Lead Set for 2019-2024 Mercedes Sprinter Vans (907REARSPKR) combines precision engineering with user-friendly operation for consistent performance across Mercedes-Benz W907 Sprinter platforms.
Mid City W907 Rear Speaker OBD Programmer & Lead Set for 2019-2024 Mercedes Sprinter Vans (907REARSPKR) Features:
- Direct Software Activation: Specifically engineered to unlock and integrate rear speaker functionality within the vehicle’s existing audio architecture.
- Intuitive Interface: Utilizes the factory turn signal stalk to navigate and adjust programming settings, removing the need for external computers or specialized diagnostic tools.
- Plug-and-Program Design: Streamlines the installation process with a straightforward OBD-II port connection, making it accessible for both professional installers and DIY enthusiasts.
- Visual Confirmation: Features a clear LED status indicator—the programming is confirmed complete once the integrated red light turns off.
- Comprehensive Kit: Includes both the proprietary OBD programmer and the necessary lead set for a complete integration solution.
Mid City W907 Rear Speaker OBD Programmer & Lead Set for 2019-2024 Mercedes Sprinter Vans (907REARSPKR) Specifications:
- Vehicle Compatibility: Exclusively for Mercedes-Benz Sprinter W907 / VS30 platforms (2019–Present).
- Connection Interface: Standard OBD-II (On-Board Diagnostics) port.
- Programming Method: ECU parameter modification via the vehicle’s CAN bus network.
- User Controls: Factory steering column turn signal stalk.
- Power Requirements: Powered via the OBD-II port; requires the vehicle ignition to be in the “On” position during the programming cycle.
- Installation Type: Non-invasive, software-based integration.
Mid City W907 Rear Speaker OBD Programmer & Lead Set for 2019-2024 Mercedes Sprinter Vans Installation Guide:
Here are the easy-to-follow installation instructions for the Mid City Engineering 907REAR-SPKR system. This kit activates the factory rear speaker outputs and the “Fader” control on your MBUX radio.
Phase 1: OBD Programming
- Wake CAN Network: Press the vehicle’s Push to Start button twice (ignition on, engine off) without your foot on the brake.
- Initialize Flash: Plug the provided OBD programmer into the diagnostic port under the driver-side dash.
- The LED on the programmer will illuminate or flash during the process.
- Once the LED turns off, the rear speaker outputs and the Fader menu in the MBUX settings are activated.
- Finalize: Unplug the programmer and cycle the ignition off and back on to confirm the “Fader” option appears in your Audio settings.
Phase 2: Dash Disassembly & Radio Access
- Remove Trim: Carefully remove the dash trim pieces surrounding the MBUX screen to access the mounting screws.
- Pull Radio Head Unit: Remove the screws holding the MBUX unit in place and pull it forward to reveal the large main wiring harness connector on the back.
- Unplug Main Connector: Release the locking lever on the large factory radio plug and pull it out.
Phase 3: Pinning the Factory Harness
- Identify Pin Locations: Locate the specific empty slots in the factory radio plug using the pin-out diagram below.
- Left Rear (+) : Pin 25
- Left Rear (-) : Pin 24
- Right Rear (+) : Pin 15
- Right Rear (-) : Pin 16
- Insert Terminals: Take the four provided speaker output leads and click the metal terminals into their respective slots (25, 24, 15, and 16).
- Note: Ensure the terminals are fully seated and “click” into place so they do not back out when the plug is reconnected.
Phase 4: Wiring & Testing
- Connect Speaker Wires: Connect the opposite ends of the newly pinned leads to your rear speaker wiring.
- It is highly recommended to solder and heat-shrink these connections for long-term durability.
- Test Audio:
- Reconnect the main plug to the MBUX head unit.
- Turn on the radio and use the Fader control to ensure sound is coming from the new rear speakers independently of the fronts.
- Reassemble: Once audio is verified, slide the radio back into the dash, replace the screws, and snap the trim pieces back into place.
Important Note
- Terminal Orientation: If a pin does not slide easily into the connector, check the orientation of the terminal. Do not force it, as you may damage the plastic housing of the factory plug.